Millions of people drive over bridges every day. You probably don't give it a second thought when you're commuting to work or traveling for the holidays. Factors like wear, exposure to the elements, and the age of a bridge will cause decay. Without proper maintenance, a bridge's structure can weaken, and the consequences can be dangerous. To keep proper maintenance of the bridge "Non-destructive testing" helps to detect defects on the bridge before they could become a significant problem.
In the same way, NDT can be done on the pipelines, the automotive industry which relies regularly upon wear and tear, Railroads, ships, and many more industries.
WHAT IS NDT?
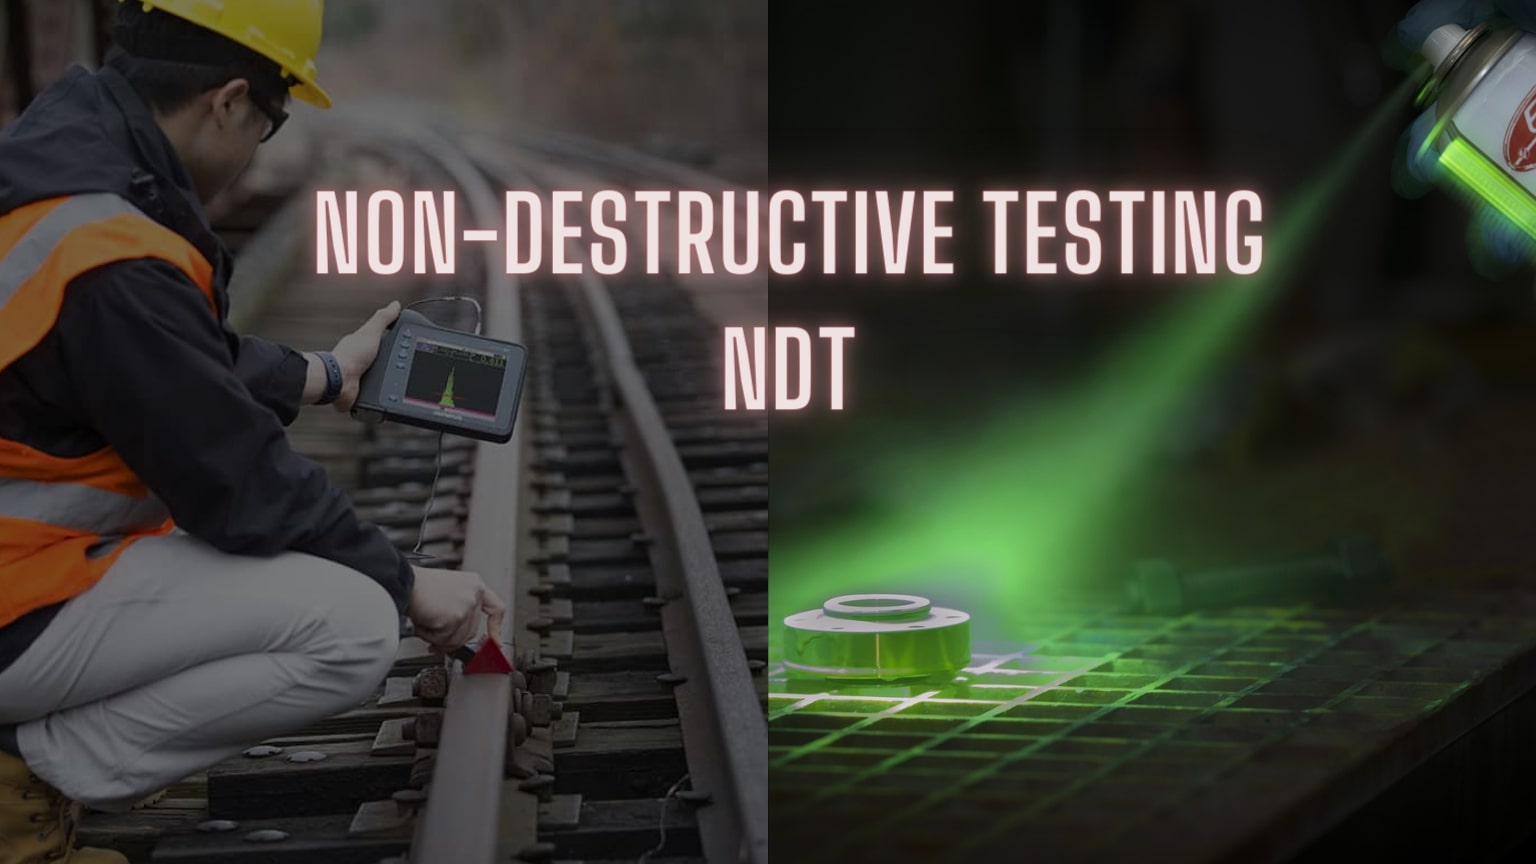
Nondestructive testing (NDT) is the process of inspecting or evaluating materials, components, or assemblies for discontinuities, or differences in characteristics without destroying the serviceability of the part or system. In other words, the amount can be still used when the inspection or test is completed.
Nondestructive testing or non-destructive testing (NDT) is a wide group of analysis techniques used in the science and technology industry to evaluate the properties of a material, component, or system without causing damage.
The representations of nondestructive inspection (NDI), nondestructive examination (NDE), and nondestructive evaluation (NDE) are also normally used to define this technique.
During the process of casting a metal object, for example, the metal may shrink as it cools and cracks or even introduce voids inside the structure. During their service lives, many industrial components need regular non-destructive tests to detect damage that may be difficult or expensive to find every day.
What are the Types of NDT?
1. Dye Penetration Testing
2. Ultrasonic Testing
3. Magnetic Testing
4. Radiography testing
DYE PENETRANT TESTING
Liquid Penetrant Testing (LPT), also anointed Dye Penetrant Inspection (DPI) and Penetrant Testing (PT), is widely used to detect surface defects in castings, forging, welding, material cracks, porosities, and possible fatigue failure areas.
Dye penetrant inspection can be applied to both ferrous and non-ferrous materials and all non-porous materials (metals, plastics, or ceramics).
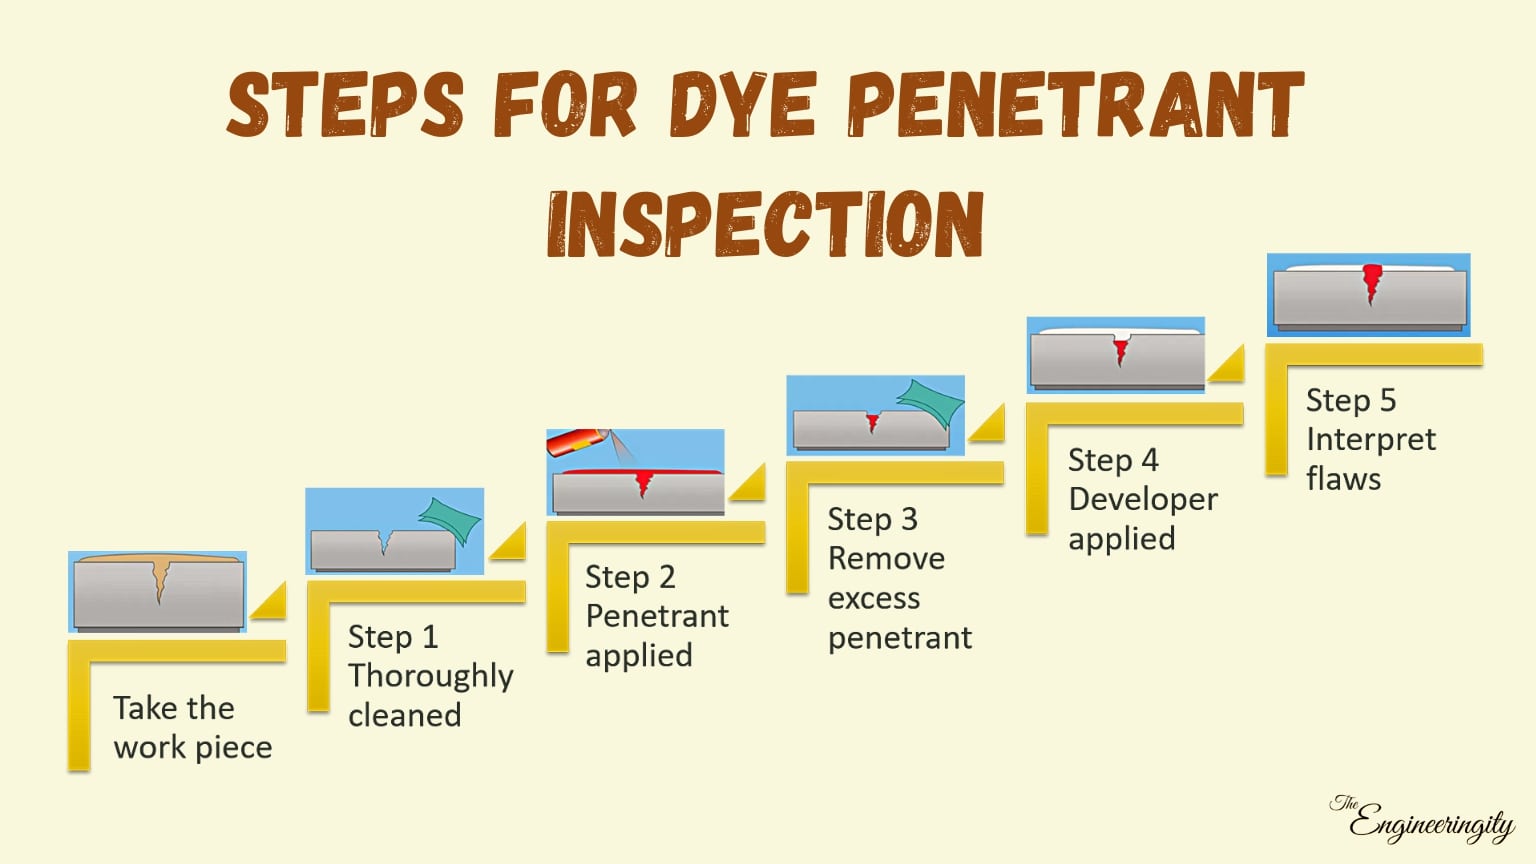
Steps for Dye Penetration:
Take the workpiece
Step 1: Clean it thoroughly.
Step 2: Penetrant applied.
Step 3: Remove excess penetrant.
Step 4: Developer applied.
Step 5: Interpretation of flaws.
Advantage:
- High sensitivity
- Rapid inspection
- Visual inspection
- Low cost
Disadvantage:
- Only surface defects
- Only non-porous required
- Direct access required
- Chemical handling and disposal
ULTRASONIC TESTING:
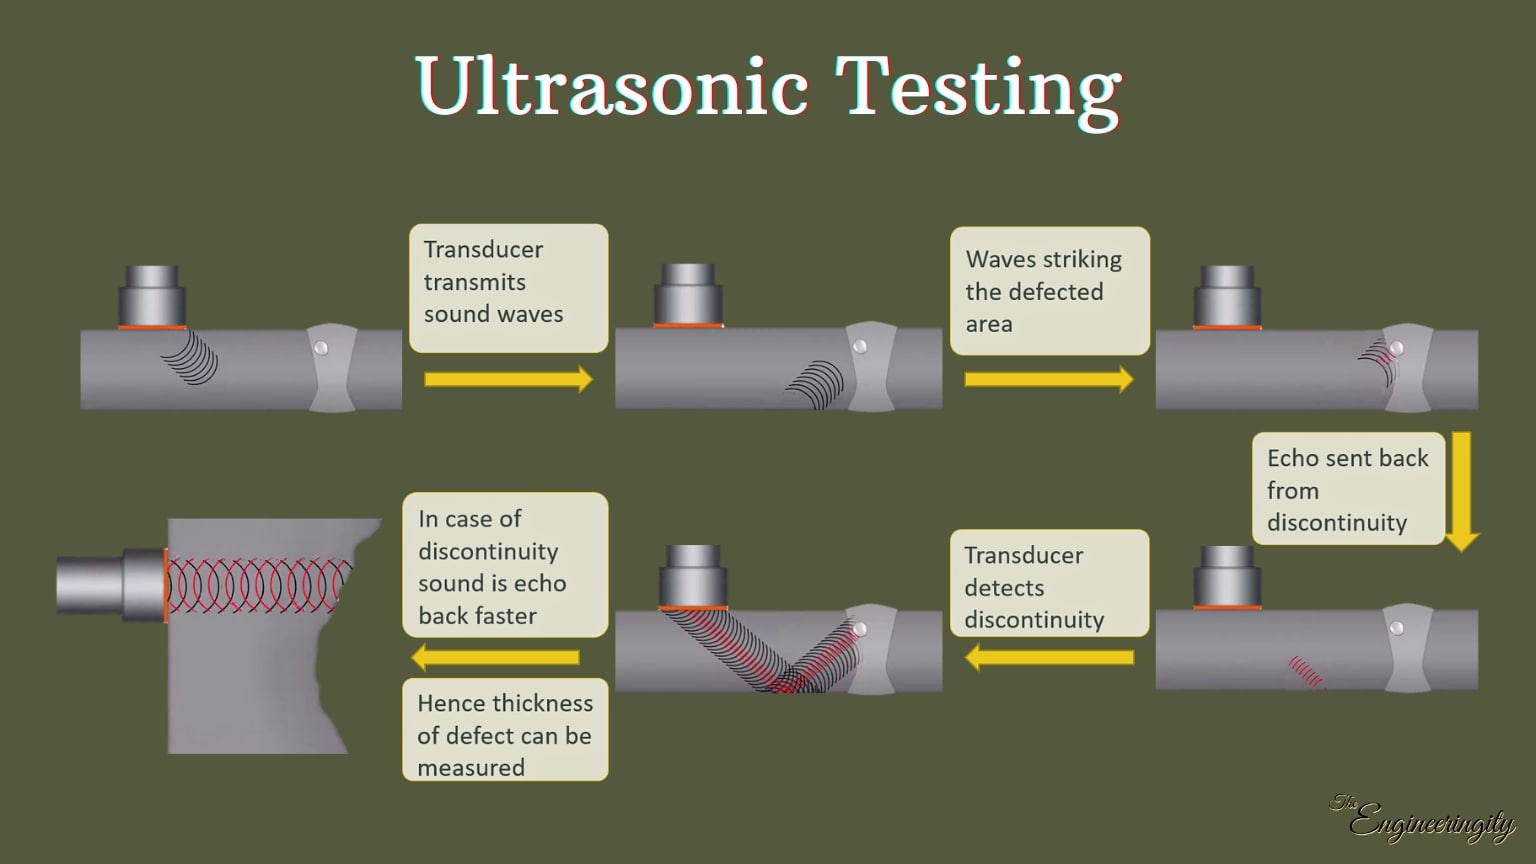
Ultrasonic testing (UT) is a type of non-destructive testing technique based on the propagation of ultrasonic waves in the object or material tested.
In most common UT applications, very short ultrasonic pulse waves with center frequencies ranging from 0.1- 15 MHz, and occasionally up to 50 MHz, are transmitted into materials to detect internal flaws or to characterize materials.
Advantages:
- Internal defects can be detected
- Access to only one side of the component is needed
- There is no radiation hazard
- Thick specimens can also be examined easily
Disadvantage:
- A high degree of operator skill is needed
- More expensive than other methods
- Needs a relatively smooth surface to couple the transducer
- Difficult to use on thin materials
MAGNETIC PARTICLE TESTING
Magnetic particle Inspection (MPI) is a non-destructive testing (NDT) process for detecting surface and slightly sub-surface discontinuities in ferromagnetic materials such as iron, nickel, cobalt, and some of their alloys.
The process puts a magnetic field into the part. The piece can be magnetized by direct or indirect magnetization
Also known as Magnaflux. This method is used to detect surface discontinuities in ferromagnetic substances. This is also used for test weld works. It is a simple and easy technique.
Types of Magnetization:
1. The specimen can be magnetized either by direct magnetization or by indirect magnetization.
Direct magnetization occurs when an electric current is passed directly through a specimen to produce a magnetic field.
In Indirect magnetization, the magnetic field is applied by using a strong external magnetic field without passing a current through a specimen.
Whereas indirect magnetization can also be done by using permanent magnets or electromagnets.
Since magnetic fields in permanent magnets cannot be varied, Electromagnets are preferred usually for testing.
Procedure for Magnetisation:
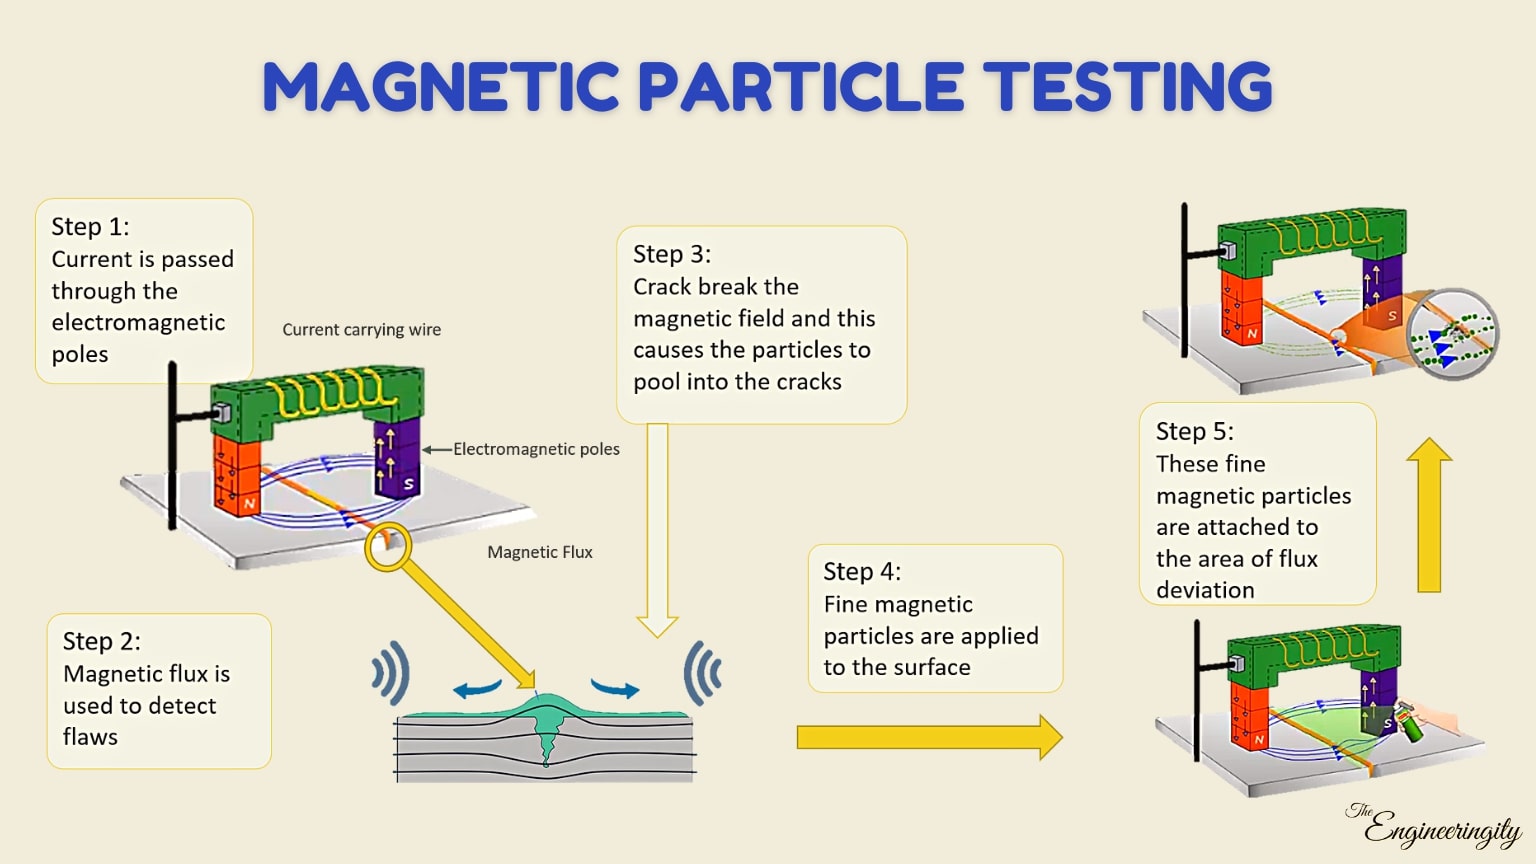
To know how the procedure is done using Electromagnets, let’s take a look at the schematic representation of it.
The component that is to be tested is cleaned first.
Step 1: The electromagnet consists of a coil of wires through which current is supplied to produce the magnetic field.
Step 2: Magnetic flux is used to detect the flaws in the specimen.
If we elaborate on the welded part of the specimen.
This flux line running along the surface will deviate from the path if it approaches a crack.
Step 3: Fine magnetic particles are applied to the surface of the specimen for visible indication of cracks.
Step 4: These fine magnetic particles are attracted to the area of flux deviation. creating a visible indication of flaws.
Advantage:
- High sensitivity
- Rapid inspection of large areas and volumes
- Suitable for parts with complex shapes.
- Low cost
Disadvantage:
- Only surface-breaking defects can be detected
- Restricted to ferromagnetic substances.
- Direct access to the surface is required.
- Chemical handling and disposal.
RADIOGRAPHY TESTING
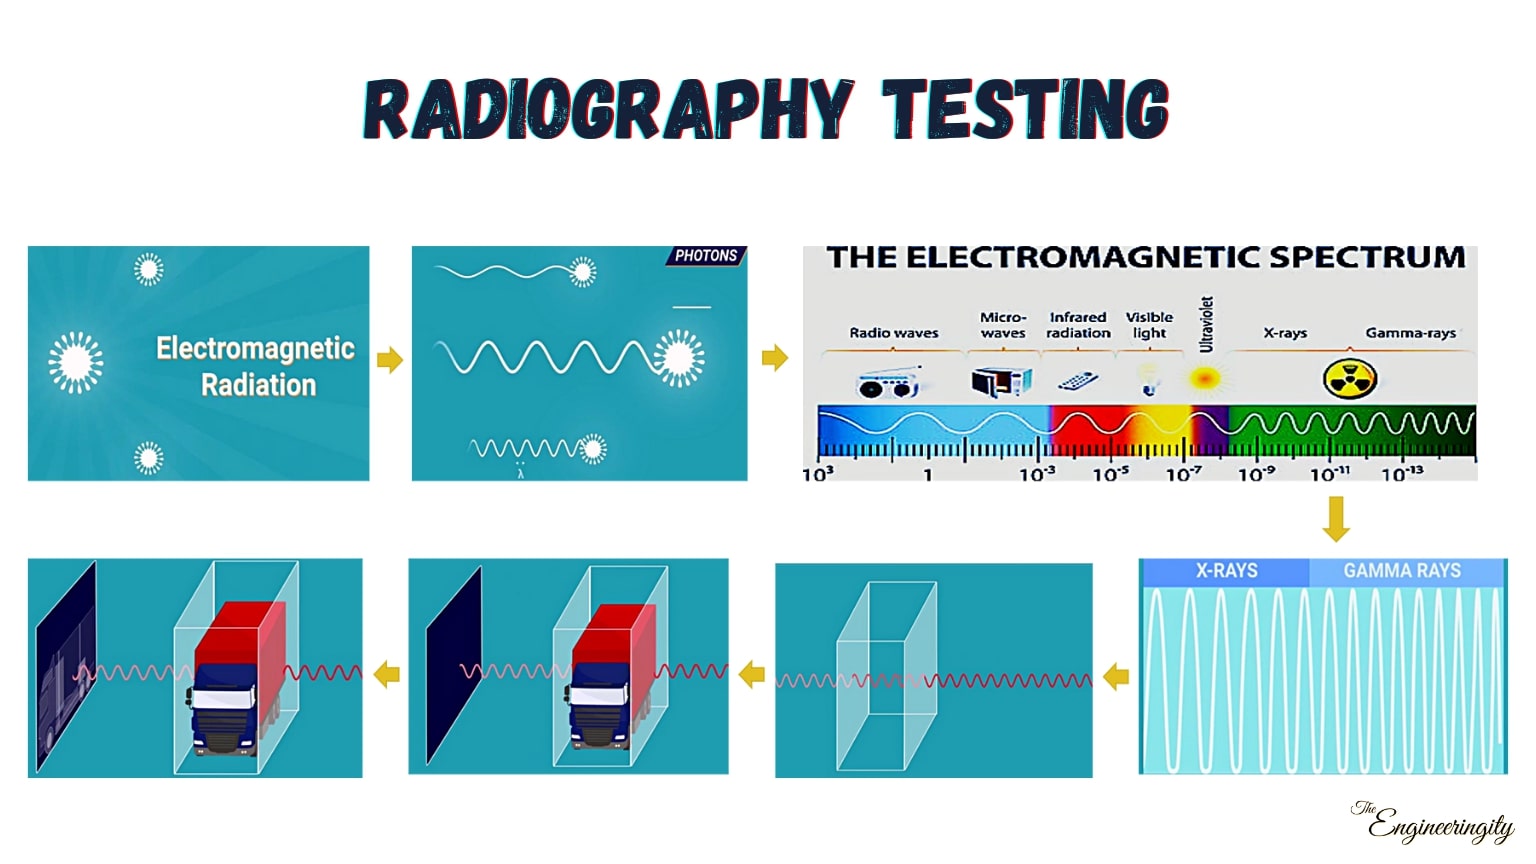
Radiographic Testing (RT), or industrial radiography, is a nondestructive testing (NDT) method of inspecting materials for hidden flaws by using the ability of short wavelength electromagnetic radiation (high energy photons) to penetrate various materials.
Either an X-ray machine or a radioactive source can be used as a source of photons This can see different things from X-rays because neutrons can easily pass through lead and steel but are stopped by plastics, water, and oils.
Advantage:
- It has very few material limitations.
- Minimal or no part preparation is required.
- RT provides images of the object under inspection.
- Can detect hidden areas.
Disadvantage:
- Slow process.
- A few seconds of being exposed to radiation can result in severe injuries.
- A high degree of skill and experience is required.
- It is quite an expensive method.
APPLICATION OF NDT
•NDT is commonly used in forensic engineering, mechanical engineering, petroleum engineering, electrical engineering, civil engineering, systems engineering, aeronautical engineering, medicine, and art.
•Non-destructive testing detects defects on bridges before they could become a significant problem.
•NDT ensures that railroads remain operational and flaws are caught well before they could pose a danger.
•Aircraft take a lot of stress from frequent landings and harsh environmental conditions. That is why prevention through regular non-destructive testing on-air and spacecraft is vital.



2 comments
Good content! Keep it up.
ReplyDeleteThank you! I really appreciate you taking the time to express that.
Deletecomment down what do you think?